归途
高铁似箭三五载
班车徐徐归家途
多少行囊多少客
多少乡音吐思心
yum安装本地rpm包及依赖
¶一、背景说明
需求:安装Readline-devel
平时我们机器有网络的情况下一般安装软件如下yum install即可。yum install readline-devel
但是在内网机上要去这样安装,就没法直接用了,没有网络下载源,这时候如果包少,我们可以去rpm包网站搜索下来手动一个个传进去rpm安装即可,但是依赖较多就麻烦了。
如readline-devel包
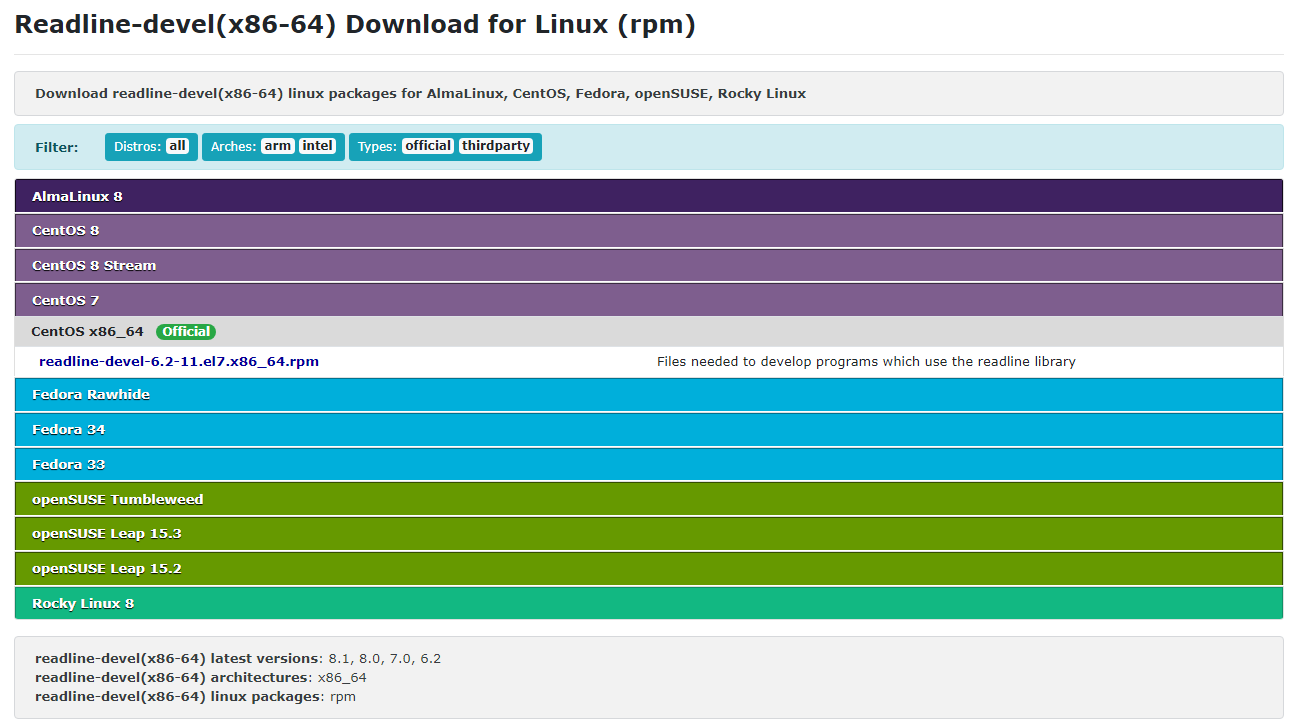
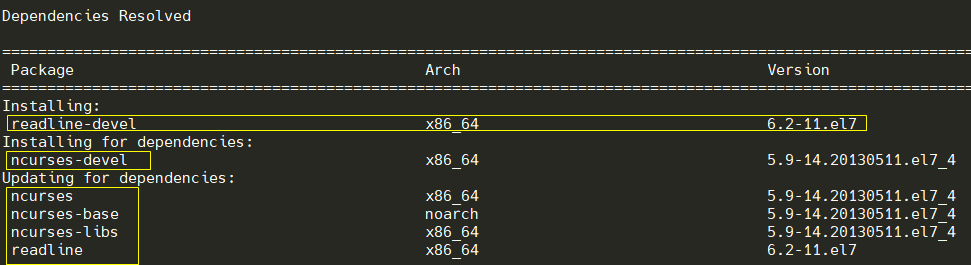
安装readline-devel 依赖包有5个,5个我们也可以手动1个个rpm很快搞定, 但是遇到其它包中又有依赖包,依赖几十个,顺序先后都是问题,这时候我们不能用rpm一个个安装了。
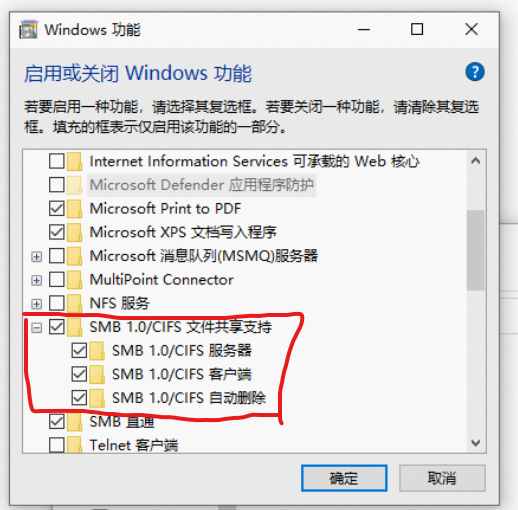
在Linux上挂载Windows共享目录
¶启用 SMB,重启
SSH连接Windows默认启用Powershell
New-ItemProperty -Path "HKLM:\SOFTWARE\OpenSSH" -Name DefaultShell -Value "C:\Windows\System32\WindowsPowerShell\v1.0\powershell.exe" -PropertyType String -Force |